You set up your chat widget from Settings → Chat Widget in your dashboard. Brand it, turn it on, and (optionally) drop it on your own website.
1. Brand it
Under Branding:
- Bubble icon — upload a PNG, JPG, or WebP, or leave it to use the Patriot Hauls mark.
- Primary and Header colors — set to match your brand.
- Greeting message — the first thing renters see. Leave it blank to use a sensible default that names your business.
A Live preview on the right updates as you change things. Tap Save to publish your changes.
2. Turn it on
Use the Widget enabled switch to turn the widget on or off everywhere it appears. While it's on, leads keep capturing.
Heads up: The widget only shows on your storefront once your storefront is published. If it isn't published yet, the widget stays hidden until you publish.
3. Add it to your own website
Under Add to your website, copy the <script> snippet and paste it just before the closing </body> tag on your site. It loads your branded widget, scoped to your business. Use Preview the live widget to see it in action first.
4. (Optional) Switch on the AI Concierge
In the AI Concierge card, flip the switch on to let the widget answer renter questions from your live inventory before handing off to you.
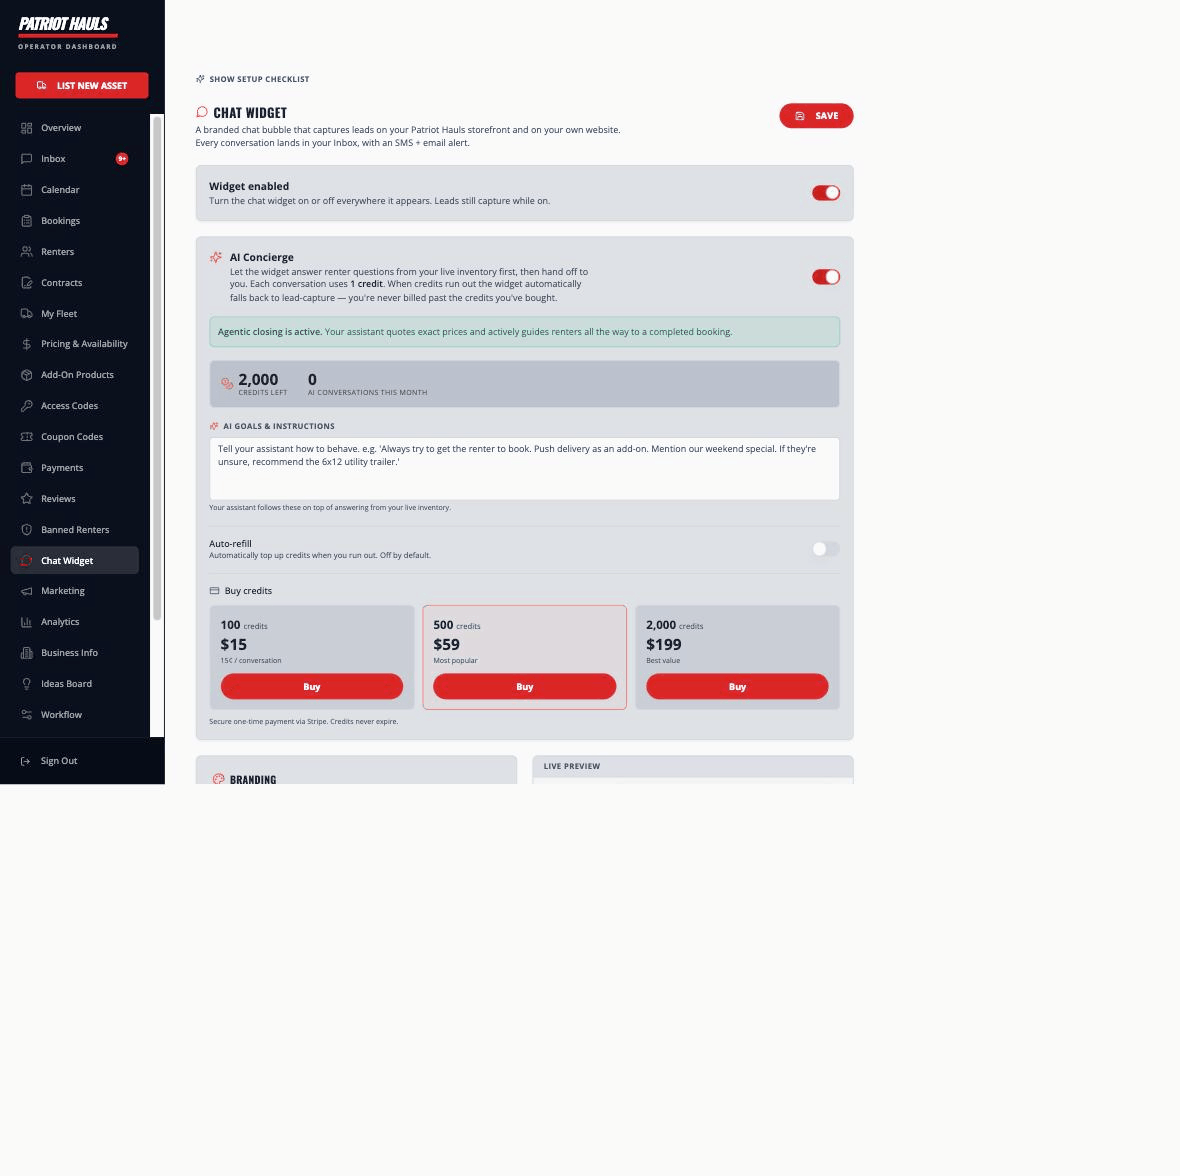
- Add AI Goals & Instructions to steer it — for example, "Always try to get the renter to book," or "Push delivery as an add-on."
- The AI Concierge uses prepaid credits. Review AI credits and cost controls before turning it on so you understand the spend guardrails.
Good to know: With the AI Concierge off (or out of credits), the widget still works — it just captures leads instead of answering.
Related
Still need help? Tap the Support button inside your dashboard.